


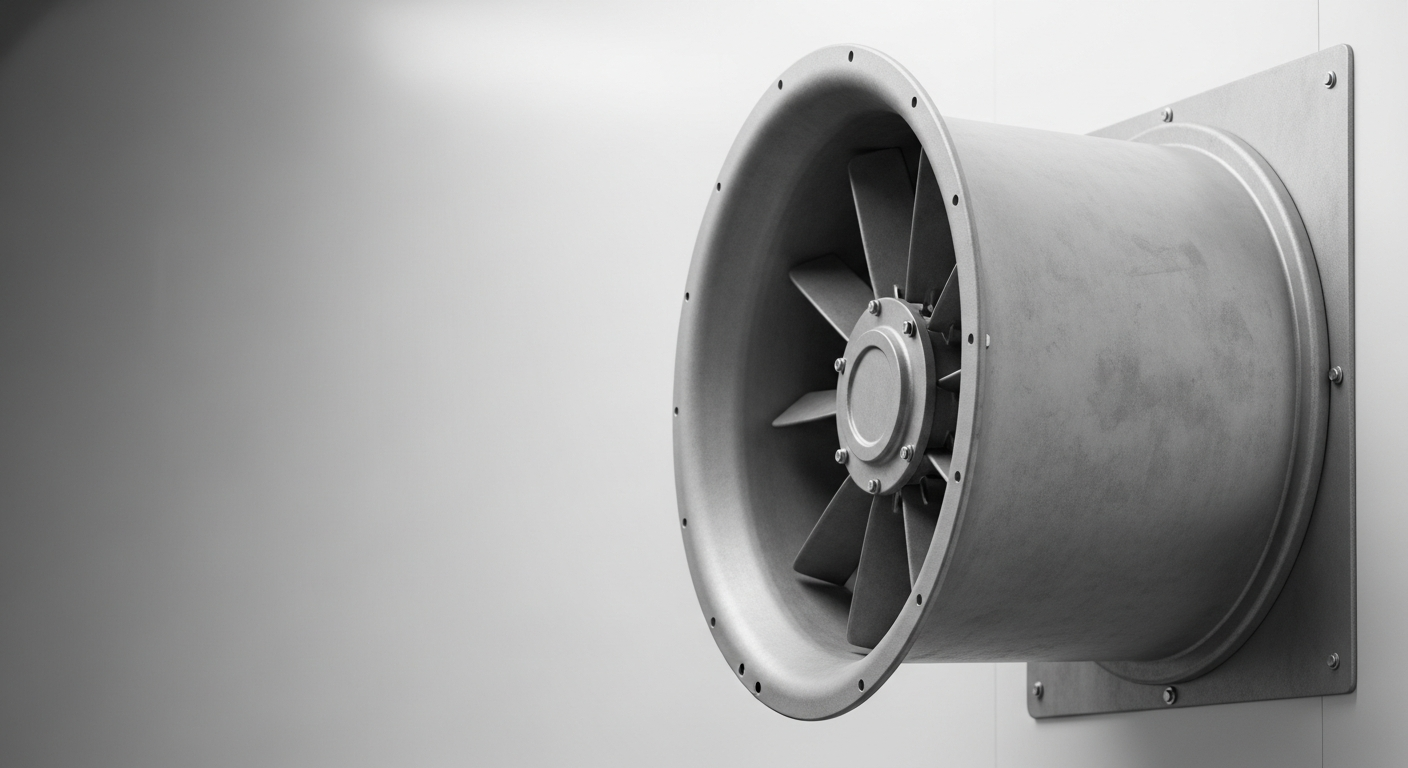
Installing an explosion-proof exhaust fan correctly is a critical safety requirement for any hazardous location, not just a step for operational efficiency. An incorrect installation voids the fan’s protective features and creates a serious ignition risk in atmospheres with flammable gases, vapors, or dust. This guide covers the necessary procedures, from site assessment to final inspection, to ensure the ventilation system is compliant and safe. Following these steps is fundamental to protecting personnel and preventing accidents. The work demands close attention to detail, strict adherence to the manufacturer’s specs, and a solid knowledge of hazardous area classifications.

Know Your Protection Concepts
Before starting an installation, you must understand the difference between terms like ‘explosion proof’ and ‘flameproof’. Our guide explains these key safety concepts clearly.
Why Proper Installation of Explosion Proof Fans is Non-Negotiable
The safety rating of an explosion-proof fan is entirely dependent on its correct assembly and installation. The enclosure is designed to contain an internal ignition and stop it from spreading to the surrounding flammable atmosphere. If bolts aren’t tightened to the specified torque, conduit seals are installed incorrectly, or the wrong wiring is used, this containment will fail. Any deviation from the installation manual can create a path for hot gases and sparks to escape, turning a safety device into an ignition source. Standards like AMCA 99-16 from the Air Movement and Control Association provide essential guidelines for constructing and installing these systems, underscoring the need for professional work. A compliant installation is a fundamental part of process safety management in industries like petrochemicals, pharmaceuticals, and manufacturing.
Pre-Installation Checklist: Foundations for Safety
A complete pre-installation check is required before starting any work. This step confirms the equipment is correct for the job, the location is ready, and all safety conditions are met. Skipping this phase leads to expensive and dangerous mistakes.
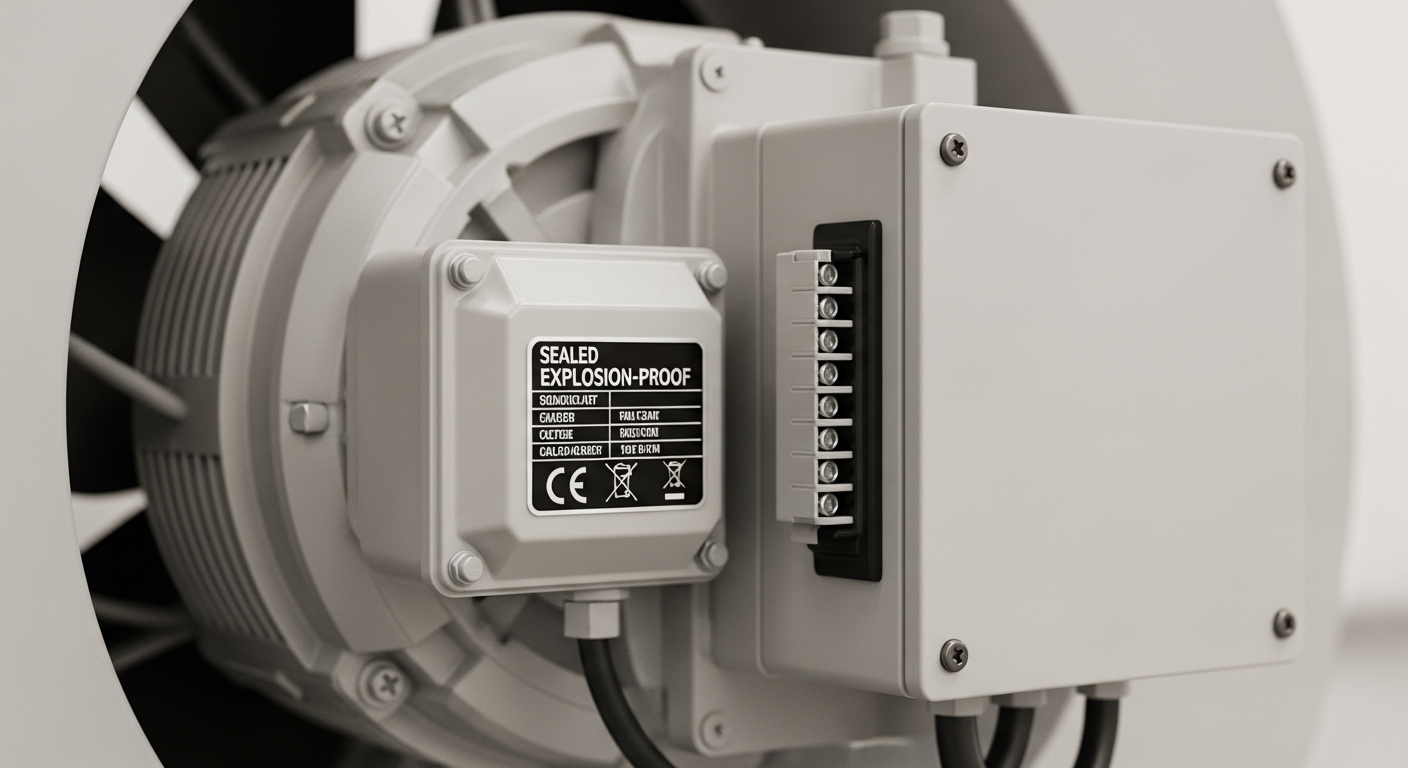
- Verify Equipment Specifications: Confirm the fan’s hazardous location rating (e.g., Class I, Division 1, Group C, D) matches the area’s requirements. Check the nameplate for certifications (UL, ATEX, IECEx) and verify the model number against project documents.
- Inspect for Shipping Damage: Examine the fan housing, motor, and blades for cracks, dents, or other transit damage. Specifically check the flame paths—the machined surfaces of the enclosure joints—as any nicks or scratches will compromise the seal.
- Prepare the Mounting Location: The mounting surface (wall, roof, or frame) must be structurally sound enough to support the fan’s weight and operational vibration. The area must be clean, level, and clear of any obstructions that could block airflow or get in the way of maintenance.
- Review All Documentation: Read the manufacturer’s installation, operation, and maintenance (IOM) manual completely. It contains model-specific torque values, wiring diagrams, and required clearances.
Step-by-Step Installation Process
The installation must be carried out by qualified personnel with experience in hazardous location wiring and assembly. Every step is critical for the system’s safety.
- Secure Mounting: Use proper rigging and equipment to lift the fan into position. Fasten the unit to the mounting surface with the specified grade and size of hardware. Tighten all mounting bolts evenly to avoid stressing the fan housing.
- Electrical Wiring and Conduit: All wiring must meet the requirements of NEC Articles 500-505 or applicable local codes. Use correctly rated explosion-proof conduit, fittings, and seals. Conduit seals must be installed within 18 inches of the fan’s terminal box to stop flame propagation through the conduit.
- Connect and Test Motor: Wire the motor following the diagram in the IOM manual. Before applying power, spin the blades by hand to confirm they don’t hit the housing. Briefly apply power to check for the correct rotation direction.
- Final Assembly and Sealing: Install all covers and access plates. Make sure all flame path joints are clean and seated correctly. Use a calibrated torque wrench to tighten all enclosure bolts to the manufacturer’s specified torque, using the recommended star or crisscross pattern for even pressure.
- System Inspection and Documentation: Conduct a final inspection to verify every connection, bolt, and seal. Record the installation date, the names of the personnel involved, and key measurements (like torque values) for maintenance logs and compliance audits.
Recommended Products for Hazardous Area Ventilation
The following products from our catalog are certified for use in hazardous areas and directly relevant to this guide:
| Product Category | Rating / Certification | Link |
|---|---|---|
| Explosion Proof Exhaust Fans | Class I Div 1 / ATEX Zone 1 / IECEx | Shop Now |
| Explosion Proof Fans | Certified for Hazardous Locations | Shop Now |
Shop Certified Explosion Proof Exhaust Fans
Our extensive catalog of certified fans meets stringent safety standards for Class I, Division 1 and ATEX Zone 1 environments, ensuring compliance and peace of mind.
Frequently Asked Questions
Who is qualified to install an explosion-proof fan?
Only licensed electricians and technicians with specific training and experience in hazardous location installations should perform this work. They must be familiar with the relevant articles of the National Electrical Code (NEC) or equivalent international standards and the manufacturer’s specific requirements.
What type of wiring is required for an explosion-proof fan?
All wiring must be installed in threaded rigid metal conduit or intermediate metal conduit. Explosion-proof fittings and sealing compounds must be used to ensure the integrity of the system and prevent gas or dust from entering the conduit and traveling to non-hazardous areas.
How often should an explosion-proof fan be inspected after installation?
A common schedule is a quarterly visual inspection of external components and an annual detailed check of blade clearance, bolt torque, and electrical connections. However, always follow the maintenance schedule provided by the manufacturer.
Can I modify an explosion-proof fan during installation?
No. Unauthorized modifications, such as drilling holes in the housing, using non-OEM parts, or altering the electrical components, will void the fan’s certification and compromise its safety features. Any necessary changes must be approved by the original manufacturer.
What is the most common mistake during installation?
The most frequent and dangerous error is the improper installation of conduit seals. Forgetting to install a seal, installing it in the wrong location, or packing it incorrectly can completely negate the explosion-proof rating of the entire system, creating a direct path for an explosion to escape.
Chat for a Quote Call: 832-699-6726
An explosion-proof exhaust fan is a critical part of a facility’s safety system, and its effectiveness depends entirely on the quality of the installation. To ensure the system functions as designed, the work must be done by qualified personnel who follow all pre-installation checks and adhere strictly to manufacturer and regulatory guidelines. Always verify the equipment ratings match the site requirements, follow the IOM manual precisely, and establish a clear inspection protocol. A correct installation is fundamental to protecting your personnel and facility.